|
||
|
Part of my job as Senior Artist at Microsoft Games Studios is to investigate new and innovative tools and techniques to share with our partners. This whitepaper was written as an introductory guide to Marvelous Designer, a clothing design and simulation tool. Documentation, tools and pipeline examples for Next Gen Clothing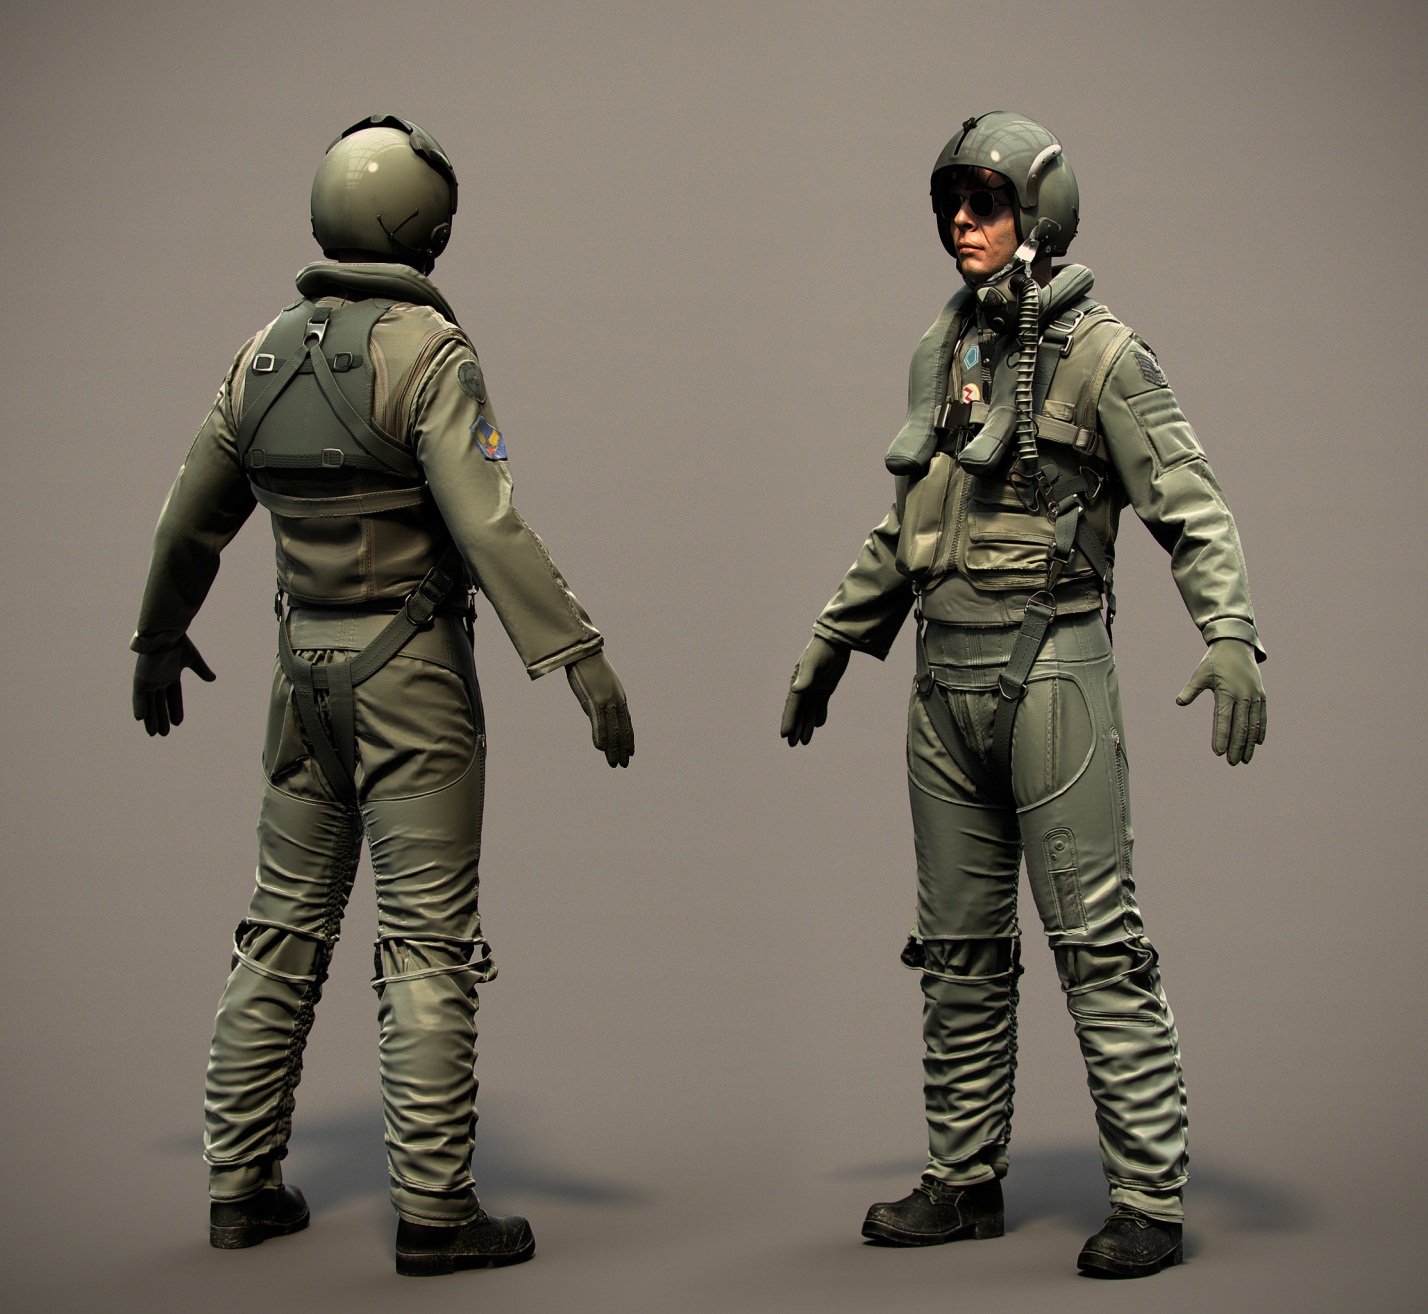 Foreword The documentation bellow will introduce a new DCC application called Marvelous Designer www.marvelousdesigner.com . This document will also provide a general overview of how to use it, and examples of how it could integrate into a character pipeline. Intro to Marvelous Designer 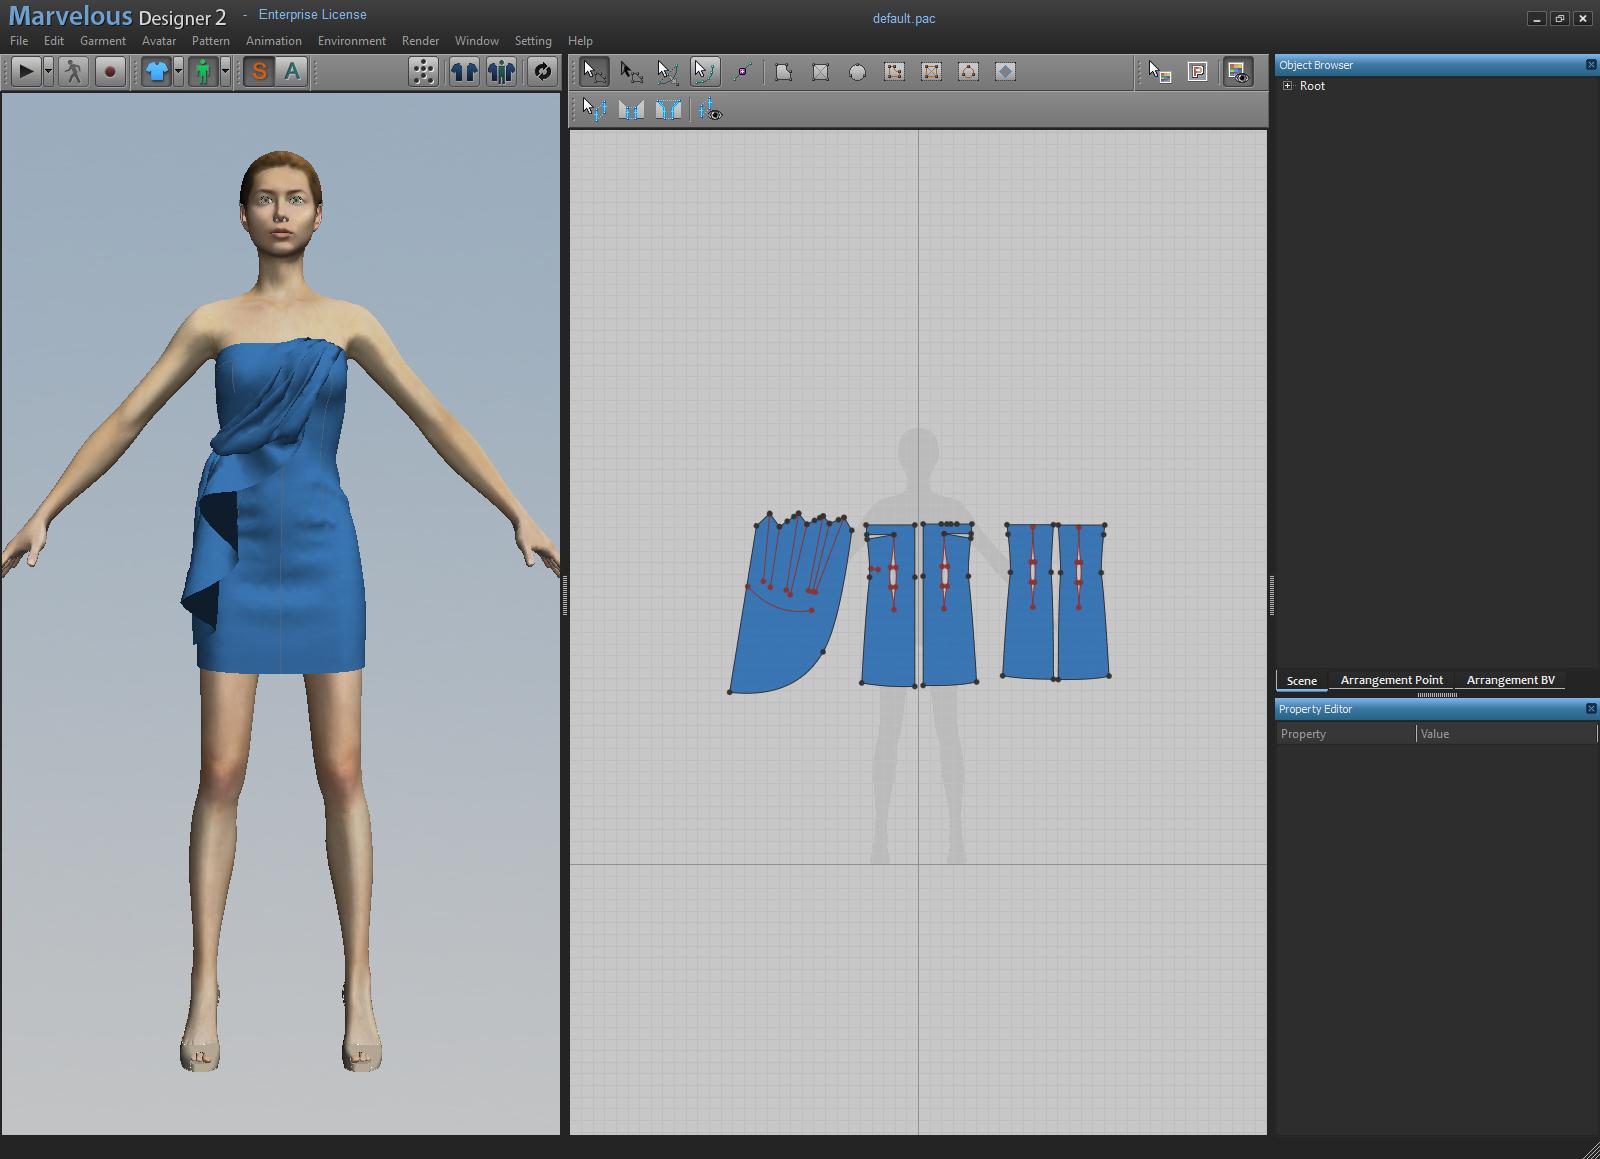 Default interface Marvelous Designer is a DCC application for designing and building 3D clothing. The basic idea is to replicate how clothes are created in the real world. This document will not replace the manual but will give a very quick overview of how easy Marvelous Designer is to use. There are also quite a few videos on the Marvelous Designer website that can do a great job of introducing the Marvelous Designer workflow: http://www.marvelousdesigner.com/Marvelous/Demo.aspx General workflow To begin you will use the pattern creation tools to draw your pattern in the 2D view. 
 Pattern creation Once the pattern is complete you will use the sewing tools to sew pattern edges together. 
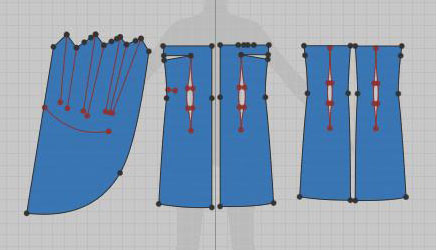
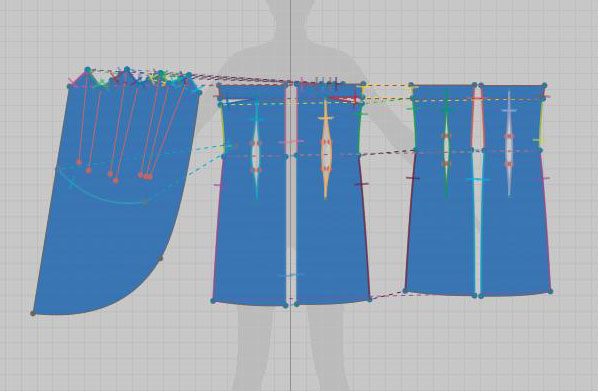 Pattern sewing With the 2D pattern complete and sewn it is time to arrange the pattern pieces in the 3D viewport so that the patterns properly drape after simulation. There are helpful tools such as arrangement points to help fit the 2D pattern to an avatar, however they are not really necessary to drape the figure. Once the 2D patterns are arranged around the avatar, you hit the simulation button and watch how Marvelous Designer sews and drapes the 3D clothing over your model. 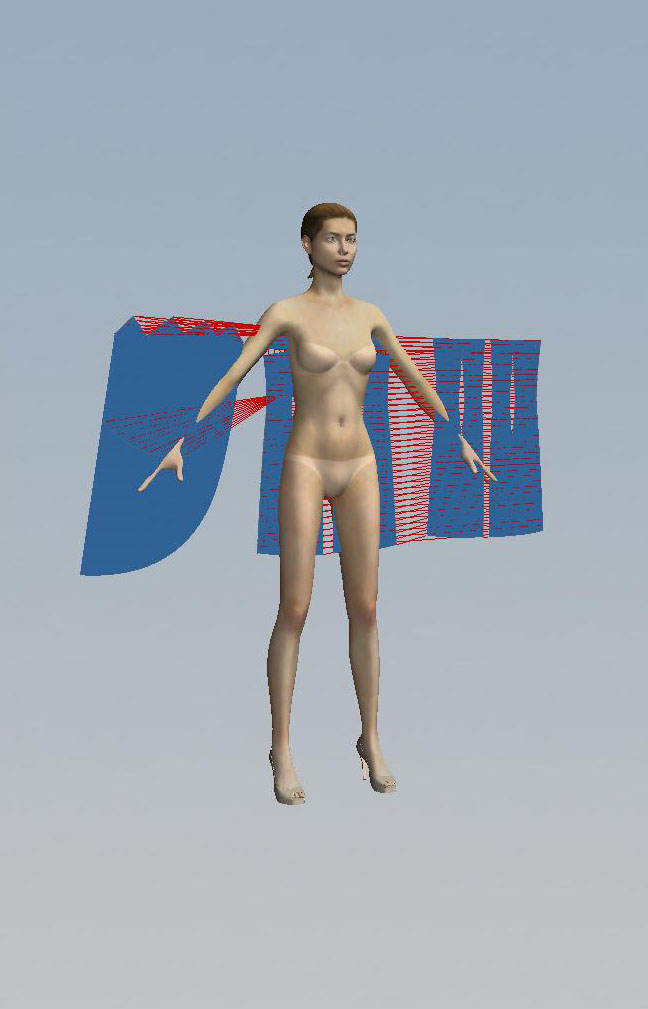
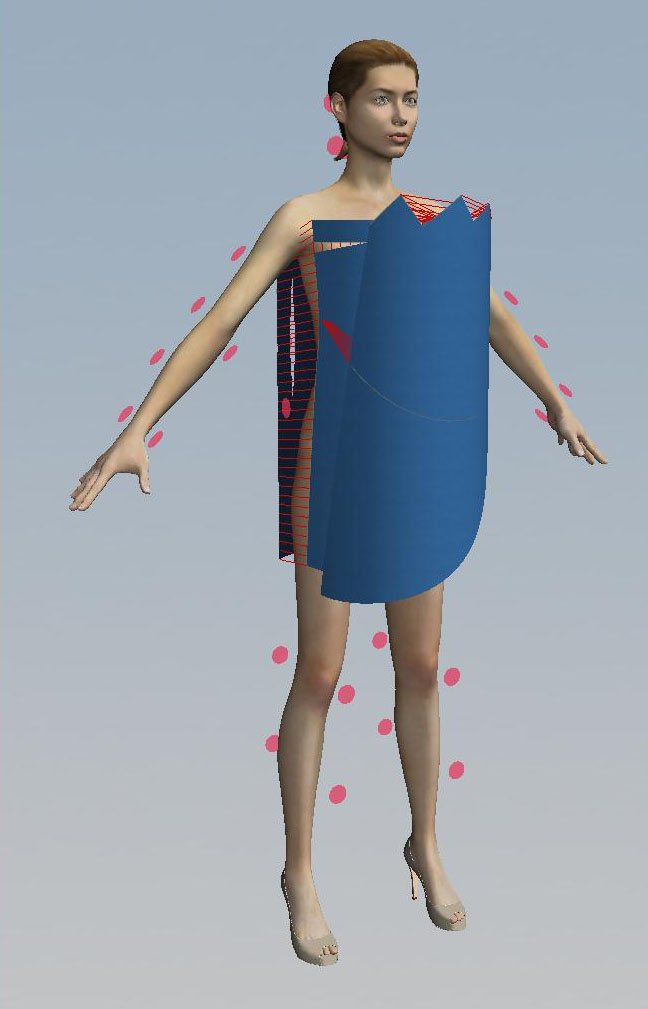
 Pattern arranging Pins and interaction 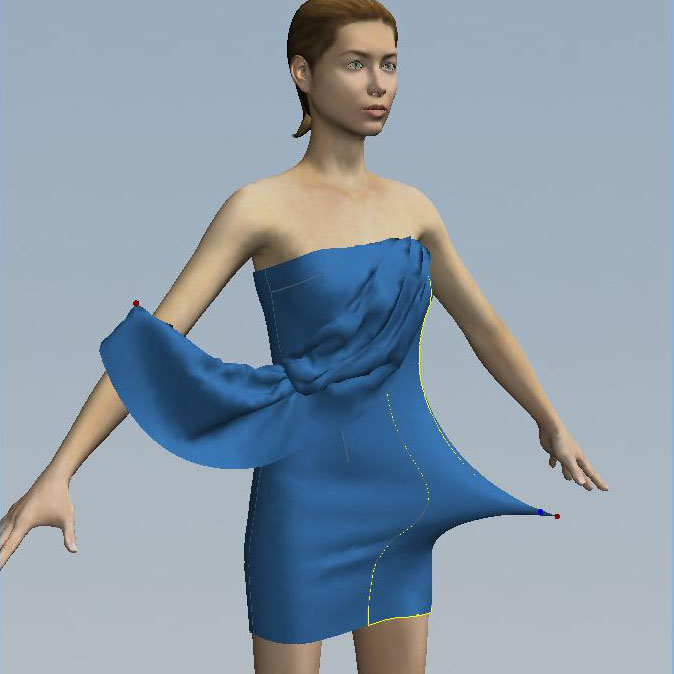 Pins and interactive manipulation For additional control over your 3D clothing, you have the ability to interactively create pins or push and pull on the fabric to either fix interpenetrations or create interesting folds/bunching. Presets  Preset window Marvelous Designer also allows for each 2D pattern to have its own physical properties like stretching along weft and warp, shearing, bending, buckling, dampening and density. Marvelous Designer also ships with presets that are specialized to either simulate faster or that describe real world physical properties. Presets can also be customized and shared with team members. Resolution 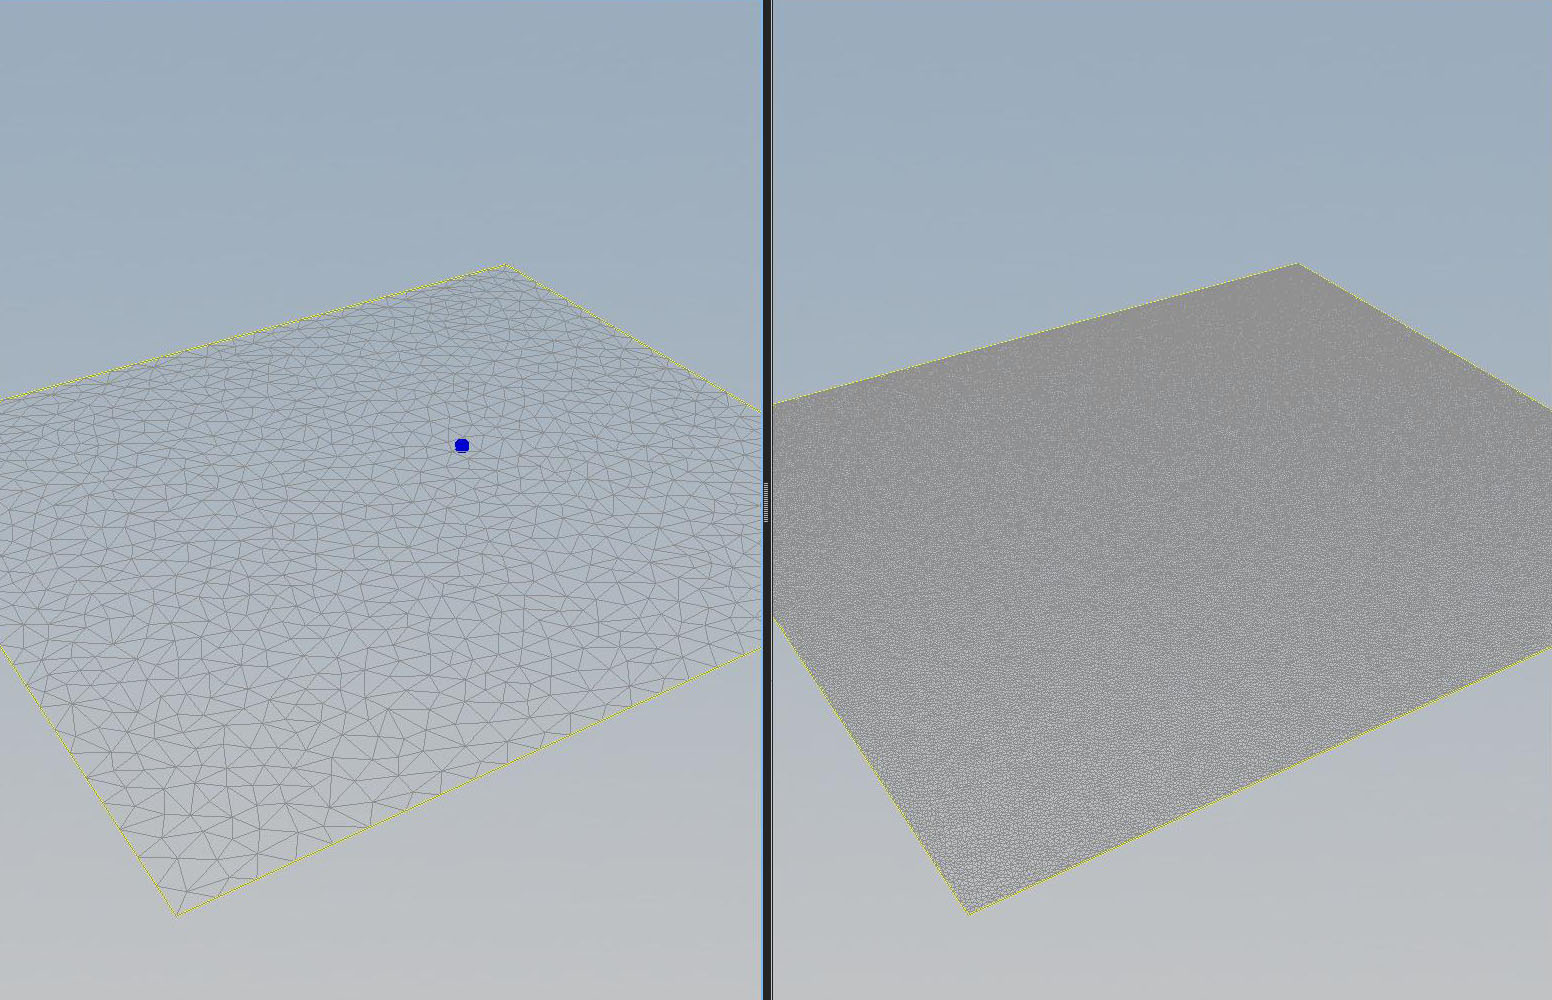 Particle Distance 20 vs. Particle Distance 3 The way resolution is handled in Marvelous Designer is by setting the particle distance of each 2D pattern. The default particle distance is 20 which is good for very fast simulations but does not hold much detail. The lowest particle distance and therefore the highest resolution you can set is 3. Any additional detailing would be better off done as a displacement or normal map. Internal Lines 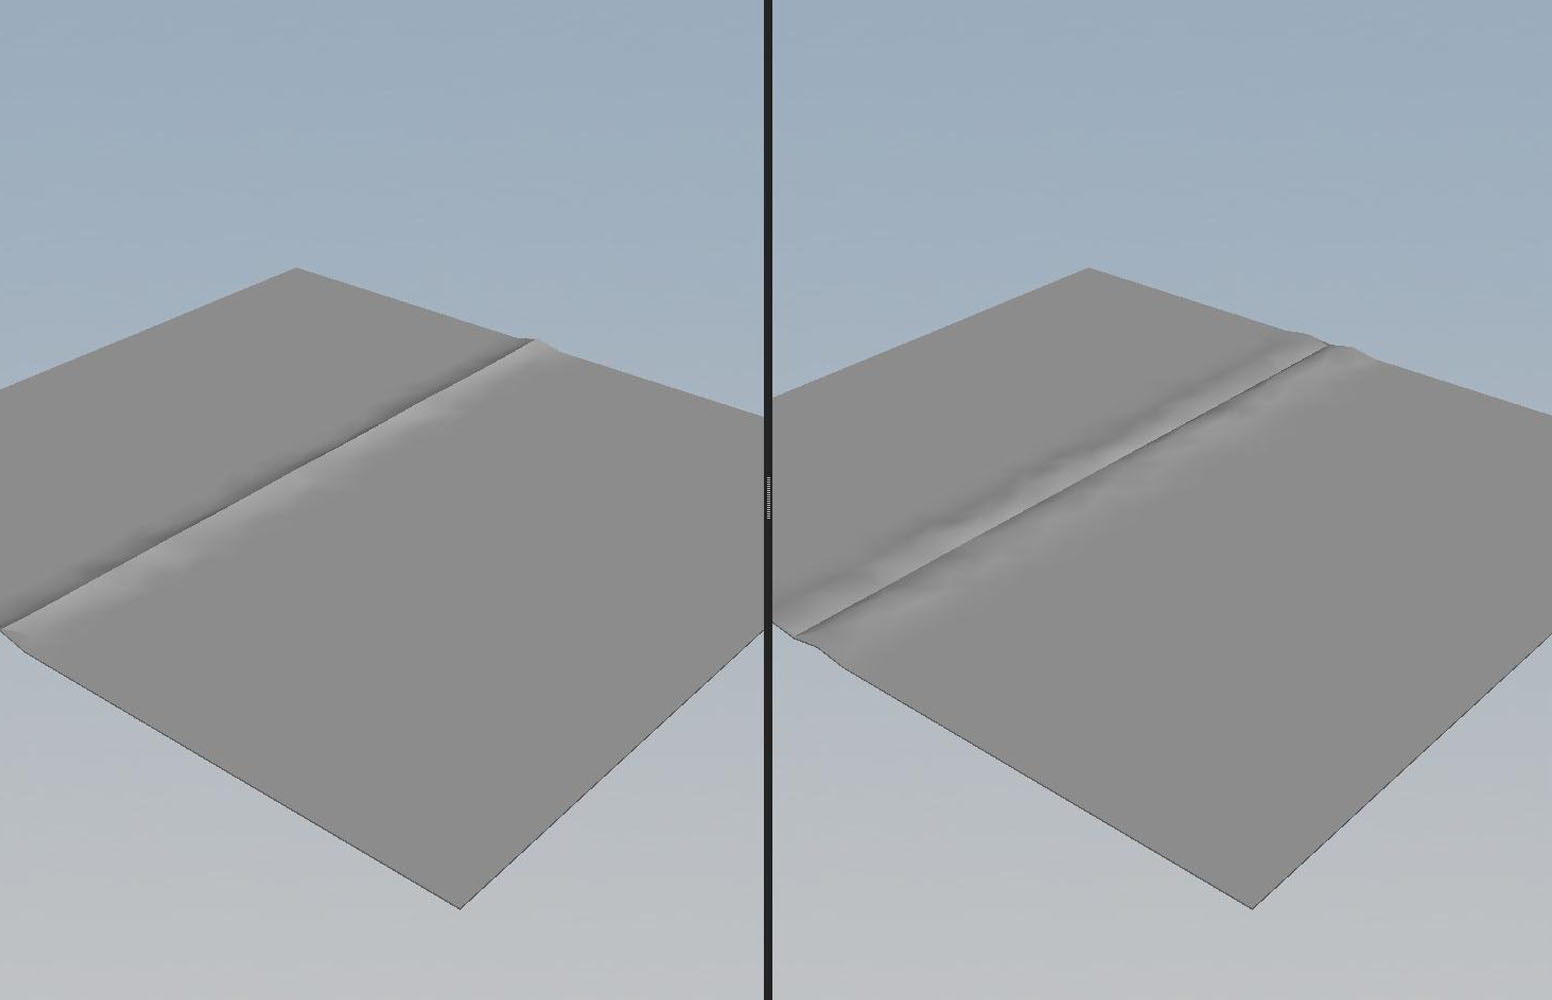 Internal line with fold angles 0 and 360 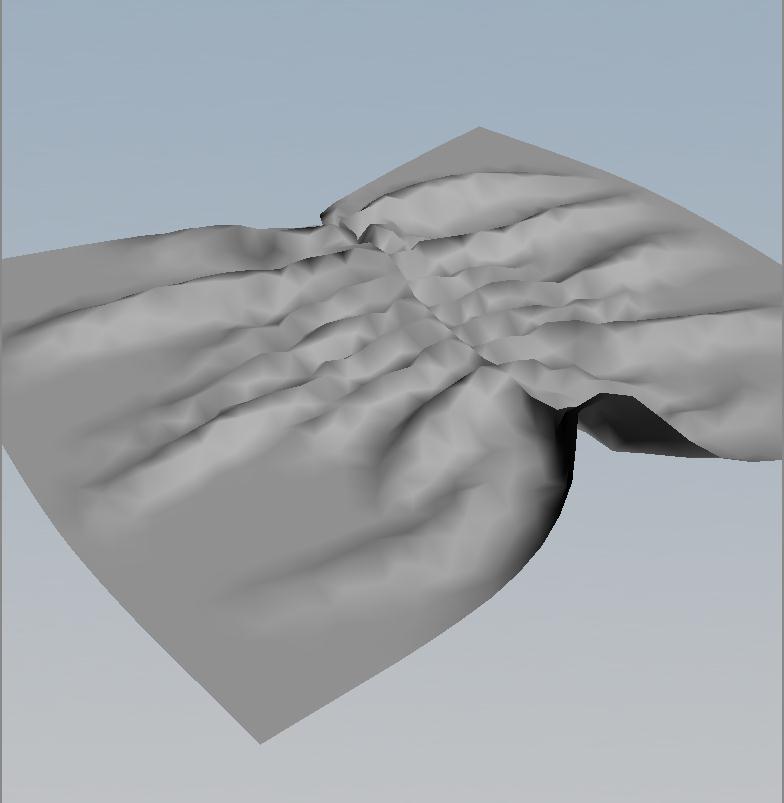 Elasticity One way to add detail to a pattern is with what is called an internal line. Internal lines can be elastic and/or have folding angles. Folding internal lines can create the appearance of seams or of pleats. Elasticity will gather the fabric along the internal line. Air force Pilot project For the purpose of this paper I wanted to create a convincing character that had multiple complex layers of clothing to illustrate how useful this application can be and how it may fit into a game pipeline. 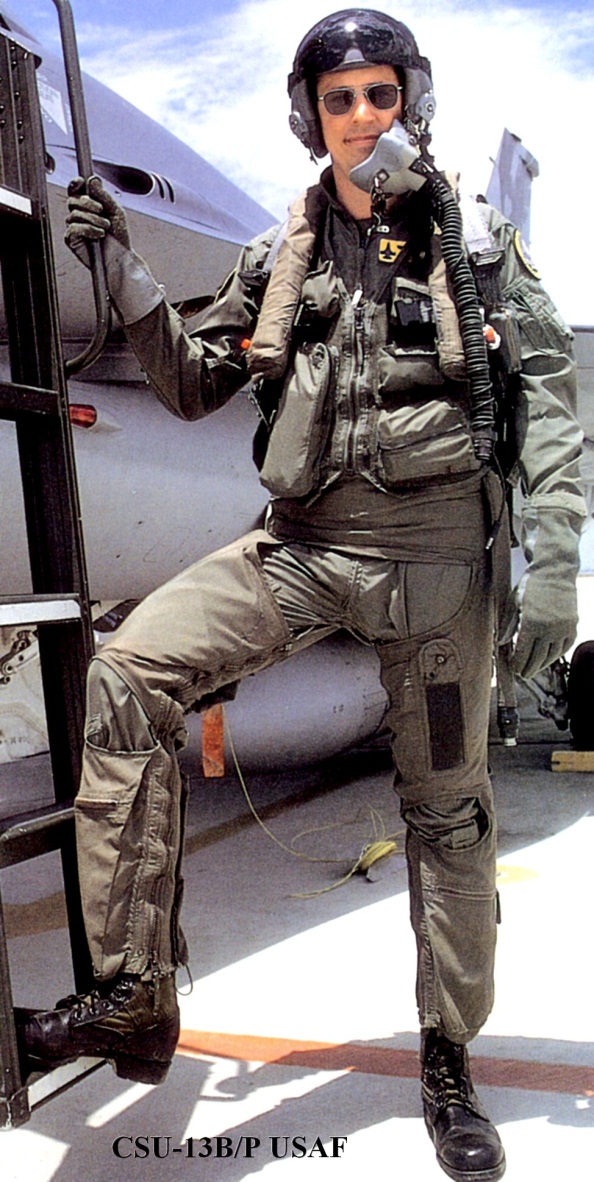
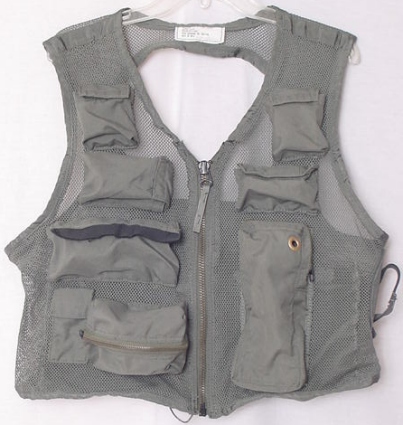 Reference Images First thing to know when creating clothing in Marvelous Designer is that the more accurate to real world patterns and designs you are the more successful your simulations will be. Therefore I did quite a bit of research on pilots and how each piece of clothing is constructed. 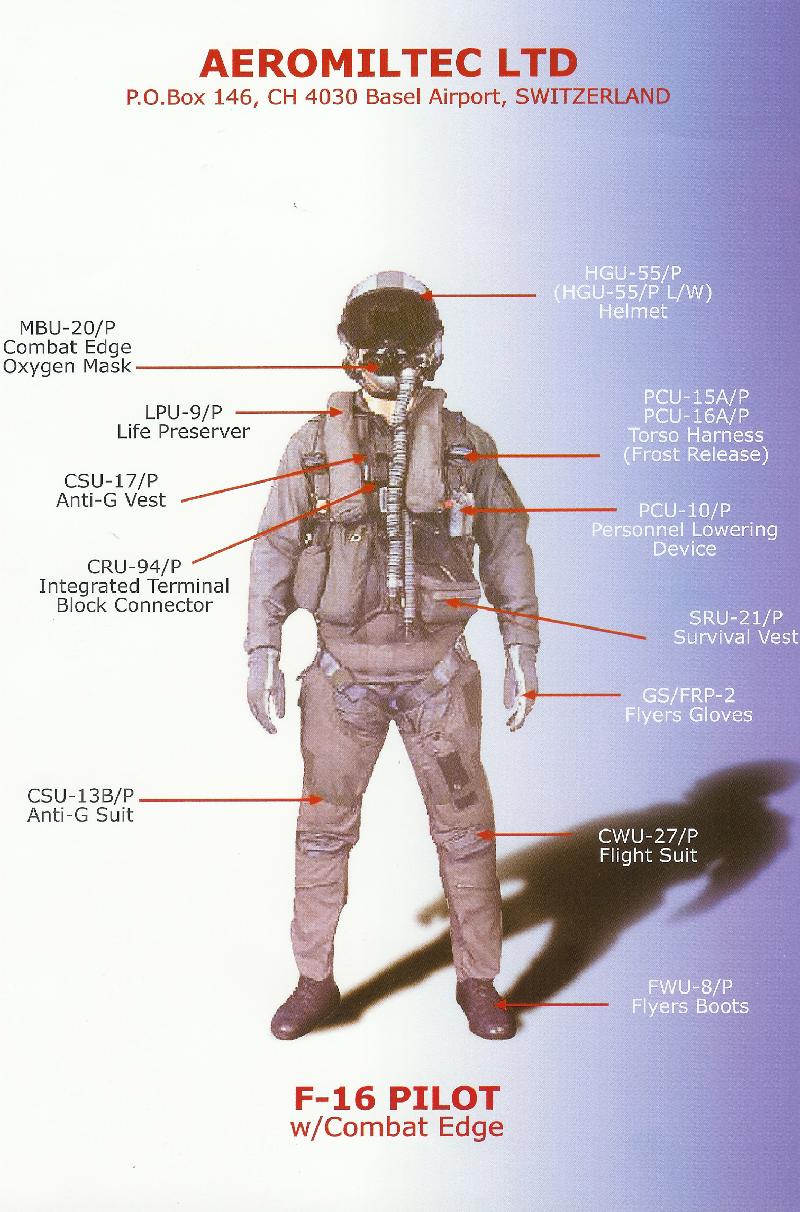 Layers of a Flight suit Next I broke down the uniform into layers so that each layer could be constructed in Marvelous Designer as its own garment. In total I created 5 separate layers of clothing: I. Flight suit II. Anit-G Suit pants and Vest III. Survival Vest IV. Life Preserver V. Straps Custom Avatar 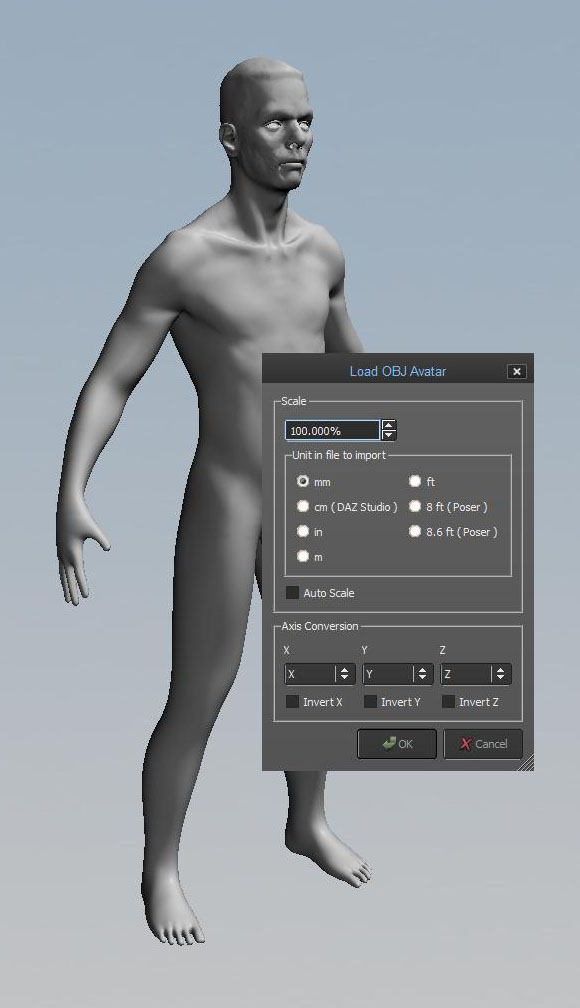 Imported Custom Avatar In Marvelous Designer I imported my pilot base mesh as an Avatar instead of using the generic female model. One thing to note: Marvelous Designer was created with real world measurements in mind and the default measurement is in mm. So you have two choices: I. Build your avatar to roughly match the scale of the standard avatar II. Set the scale and units at import First Layer 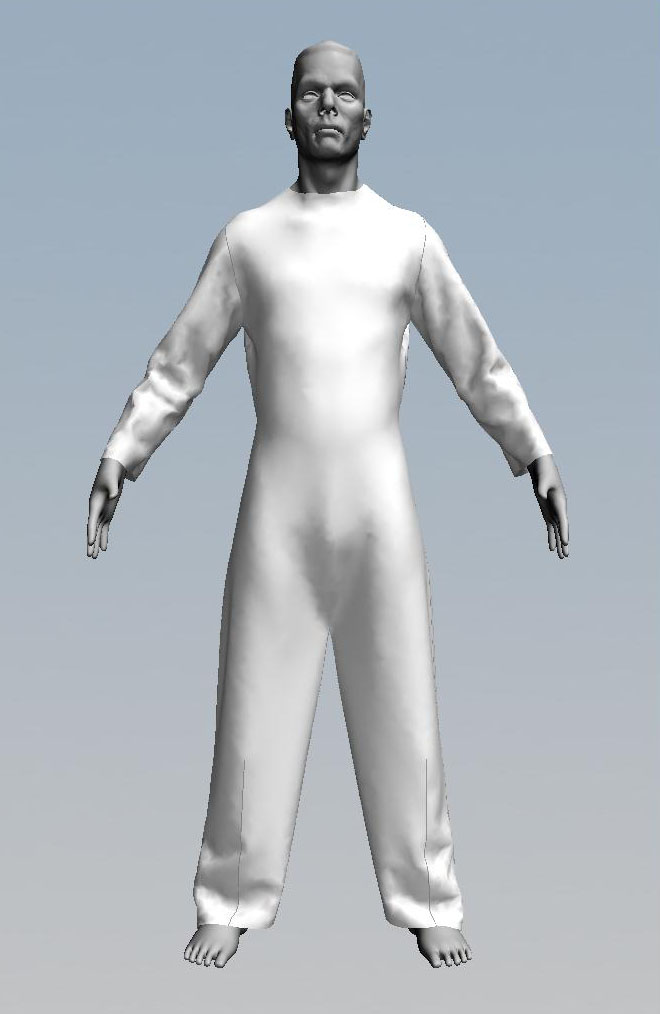 Flight Suit first pass The first layer of clothing I created was the flight suit. The best way I found to create custom patterns is to rough out the pattern quickly and drape it on the figure to see what needs adjusting. 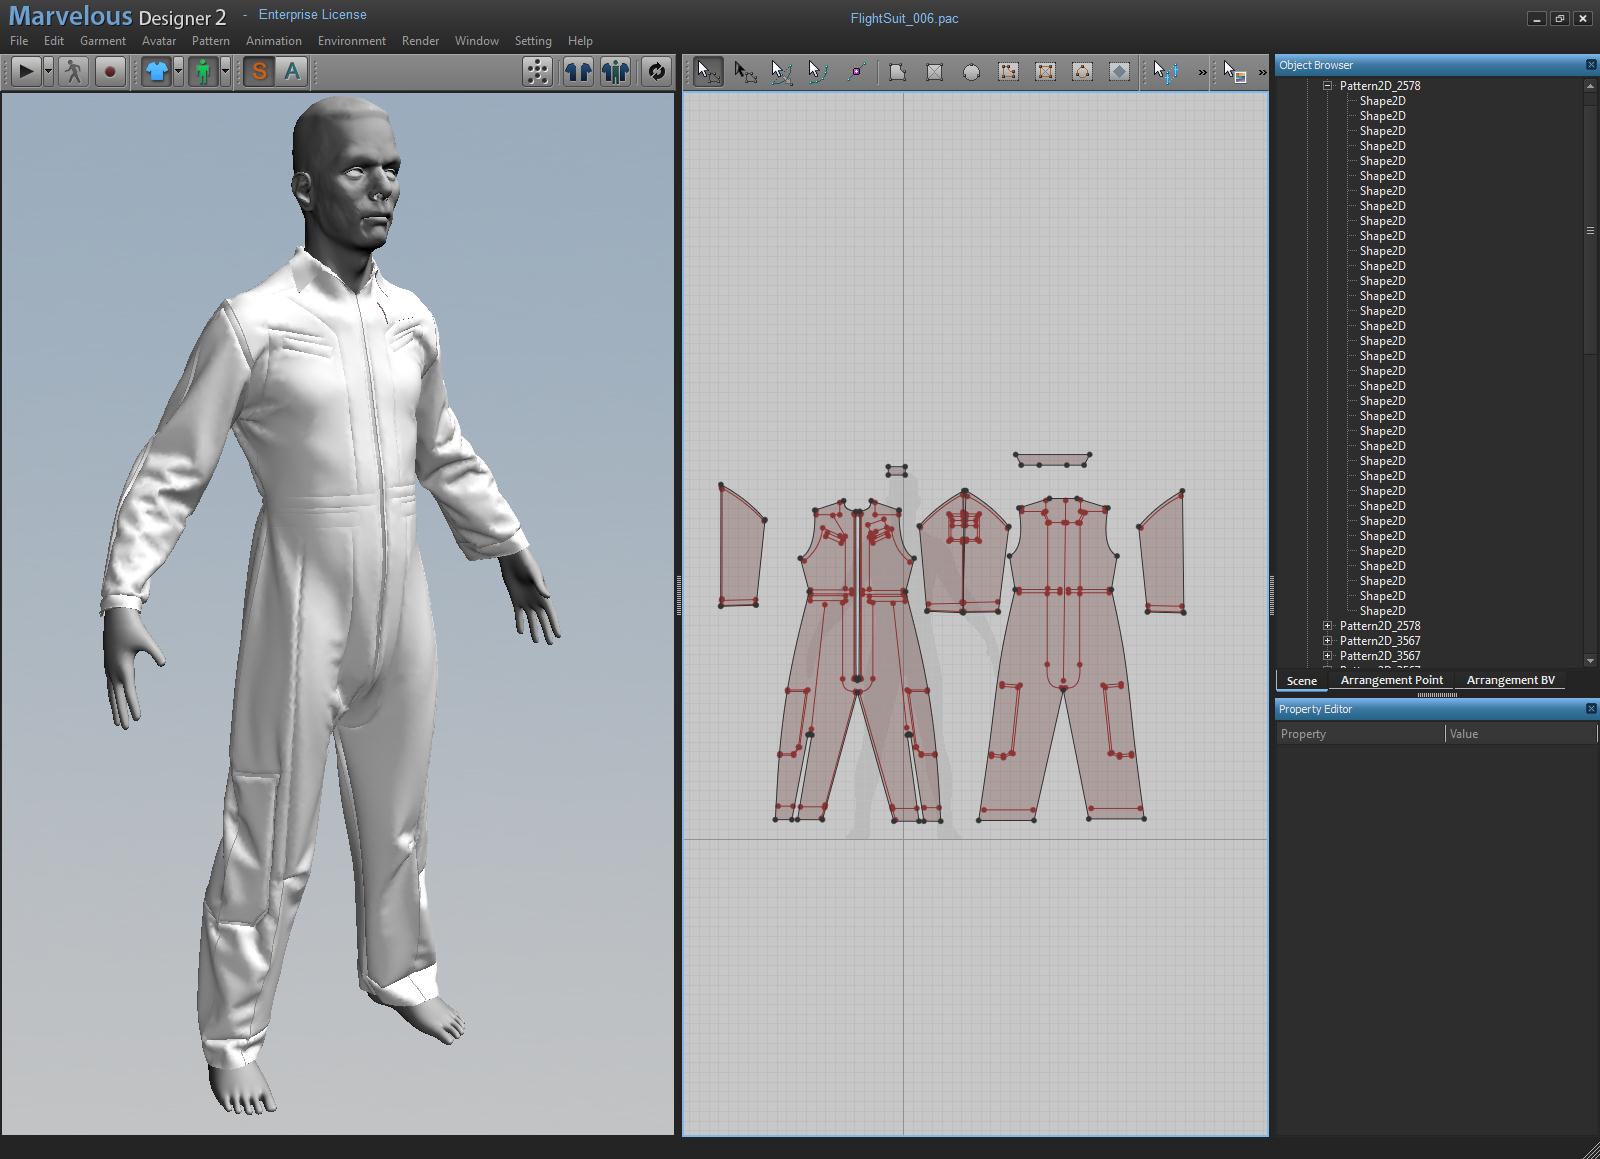 Final Flight Suit Once my rough pattern was created I used it as reference to draw a final version with curved edges and darts for a tailored fit. As a final step I added internal lines to create seams and sewn on patches. Up to this point I have been working with a low particle distance. As I get closer to a final pattern with all of the details I want, I steadily lower the particle distance so that I get a more refined mesh that will hold more detail. Layering garments 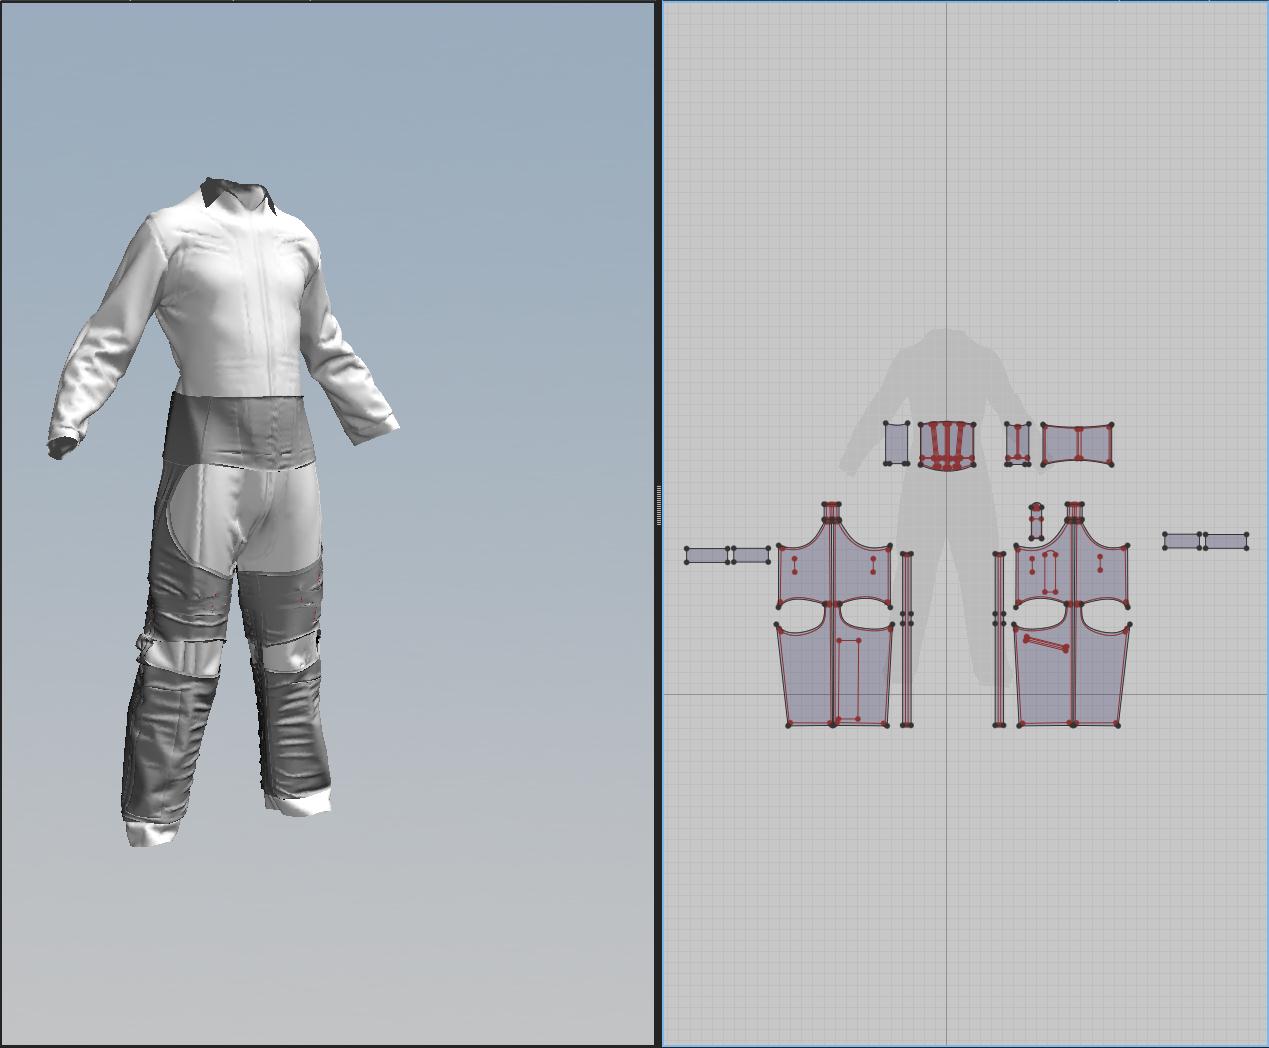 Anti-Gravity pants over Flight Suit Avatar With the flight suit garment created and simulated I first saved the flight suit as a garment file. I then exported the flight suit as an obj file. To begin the next layer of the outfit (the anti-gravity suit) I imported the obj of the flight suit as my new avatar to work on top of. This way I knew that whatever new layer I was creating would sit perfectly on top of the previous layers. Once the Anti-G suit was completed I saved my garment file and exported the flight suit avatar and the Anti-G suit as an obj for use as the next layers avatar. I worked this way through all of the layers making sure to save out each layer as a separate garment file as well. Simulating altogether 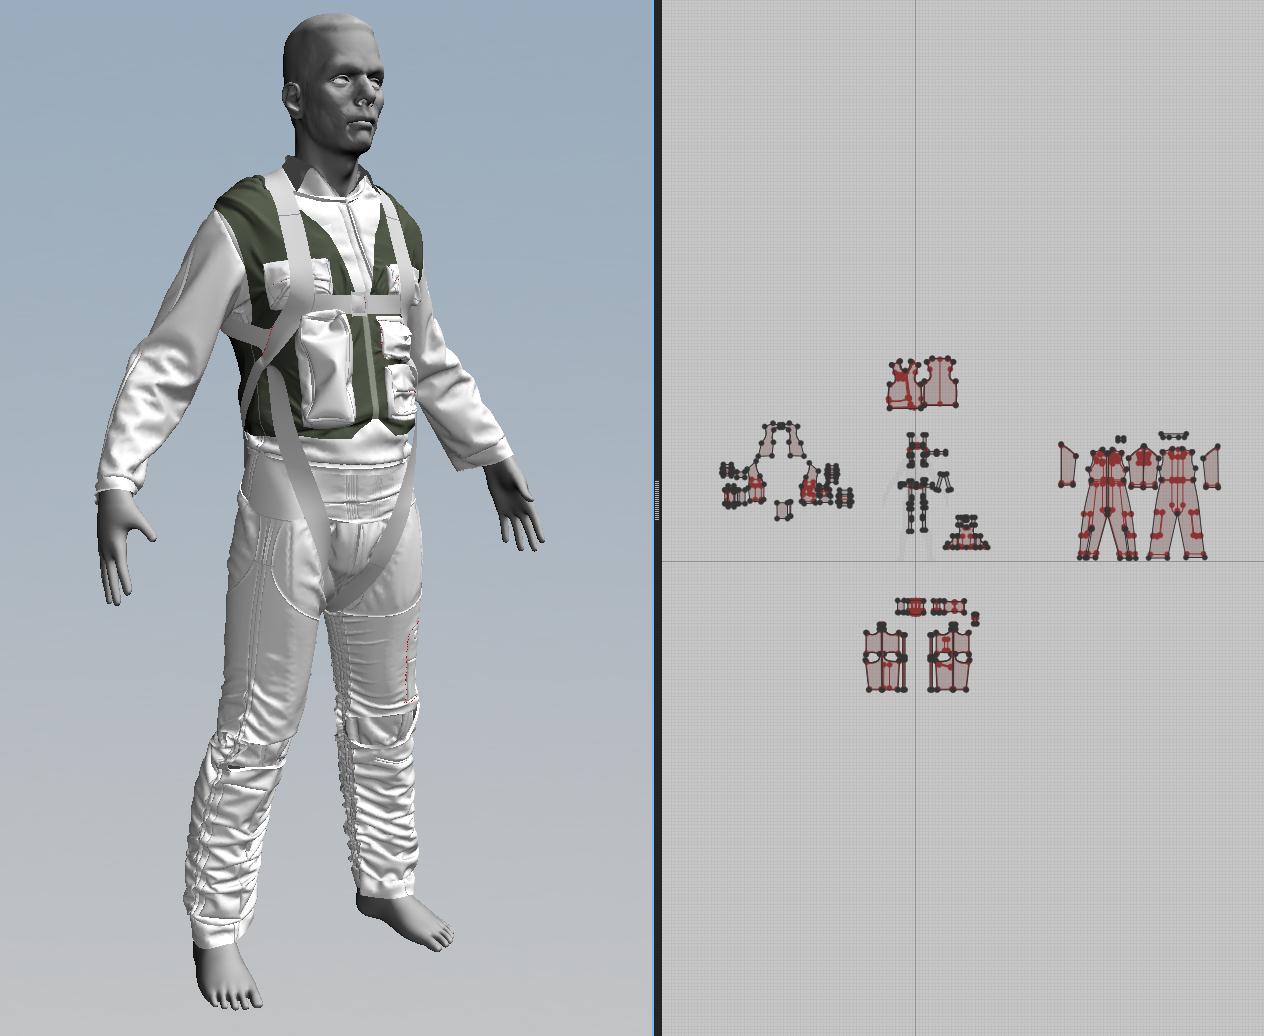 Final garment with all 5 layers simulating Once my 5 layers of clothing are generated and saved as their own garment file, I create a new file and load in the original base avatar. I then add each layer using the "Add Garment" command and ran a final simulation to have all of the layers interact with each other. This was especially important for the final strap layer as it pulled the underlying layers in interesting ways. Once the simulation was done I did a final export as on obj. Retopologizing in 3DS Max 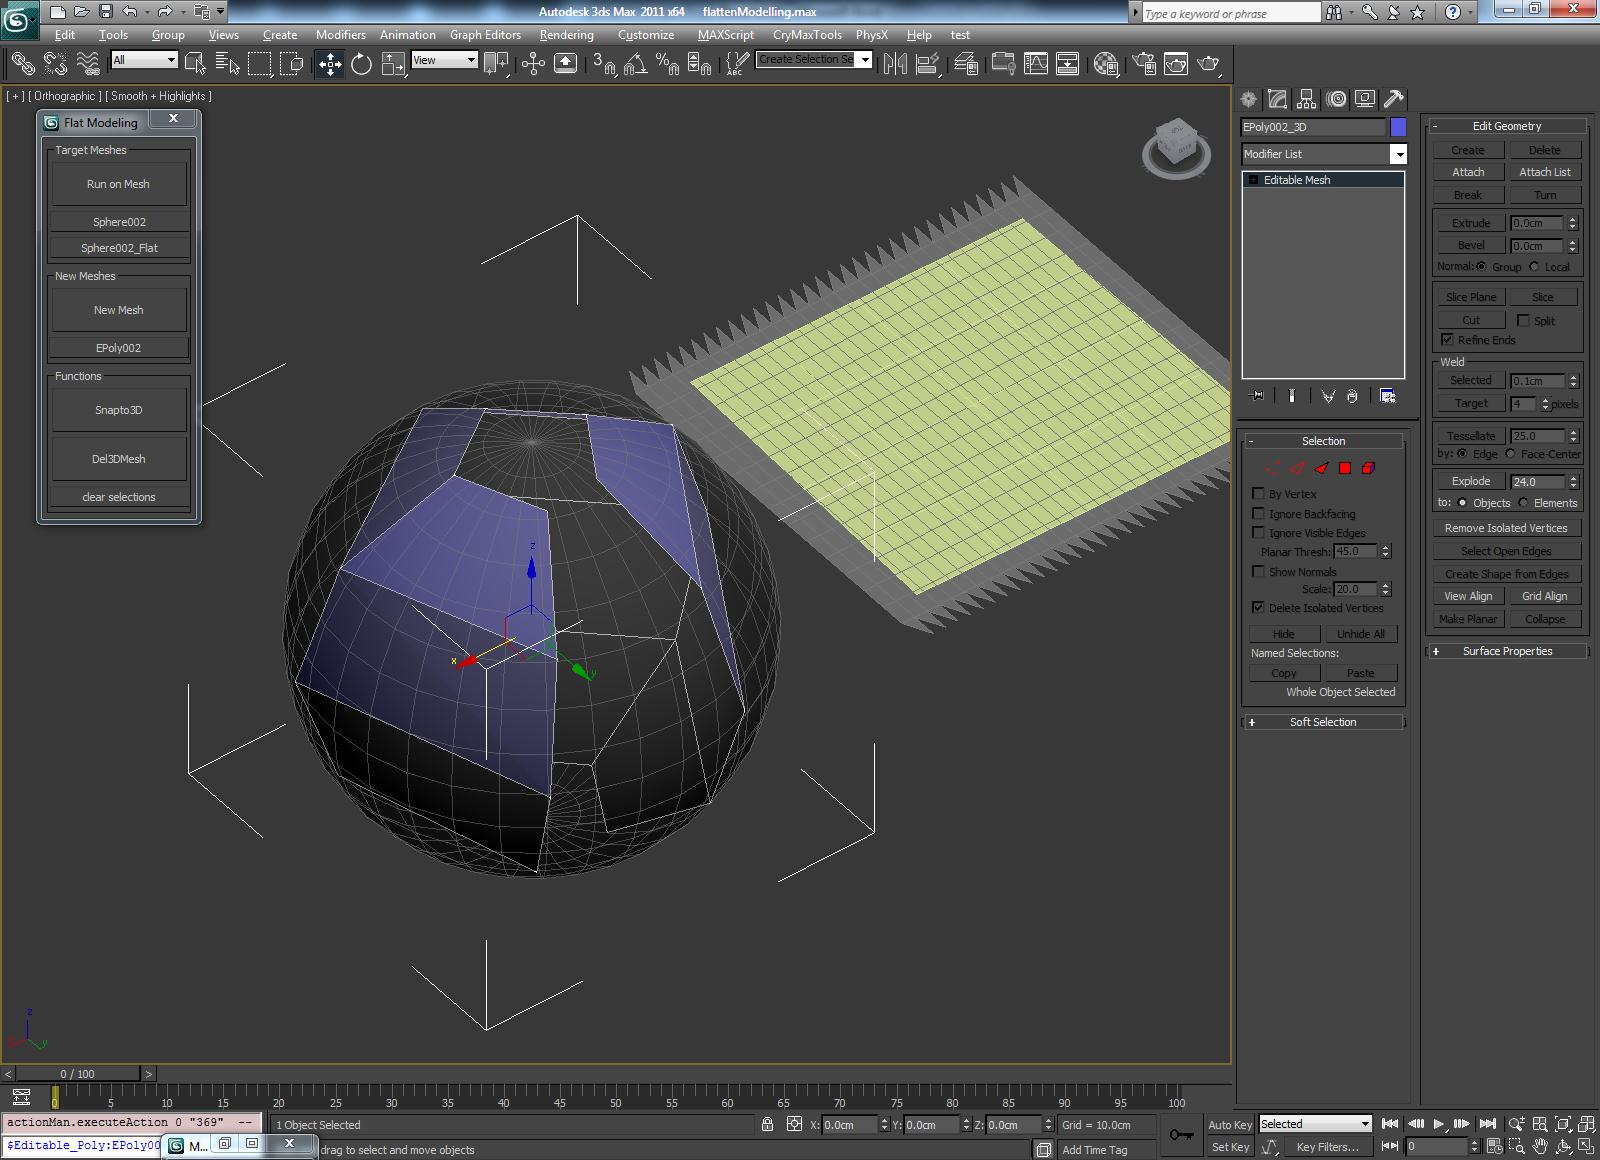 Example of flat 2D model snapped to complex 3D shape Right now Marvelous Designer only exports triangulated meshes. This is a problem if you would like to detail your 3D clothes inside of a sculpting package like Zbrush or Mudbox. Generally 3D artists will retopologize the exported 3D clothes in a 3D package and use that mesh to sculpt from. What I have done is create a script for 3DS Max that takes the 3D cloth mesh and creates a flattened copy based off of the UVs (The UVs look exactly like the 2D patterns created in Marvelous Designer). This flattened model is then used to retopologize since it is much easier to build a topology in a 2D view. My script then does a raycast from each vertex onto the 2D mesh to find the appropriate face that it sits upon. The tool then generates a copy of the retopologized mesh and snaps each vertex to the face of the original 3D cloth. Retopologizing in this way has several benefits. I. The poly flow is not influenced by the folds of the geometry II. Deep folds or overlapping geometry are not an issue III. UVs are done for you based on the flat model *** The script described above was created at Microsoft and is the property of Microsoft Studios. Unfortunately this means I cannot distribute it. If you are interested in retopologizing inside of 3ds max in a similar fashion as the script, take a look at 3ds max's mesh and uv channels, and the projection modifier in the help menu. Future releases of Marvelous Designer will have quad mesh output and there are some examples of how it is looking but no concrete date on when this will be ready.Since writing this whitepaper, Pixologic has released QRemesher for Zbrush which does a fantastic job of automatically retopologizing meshes. 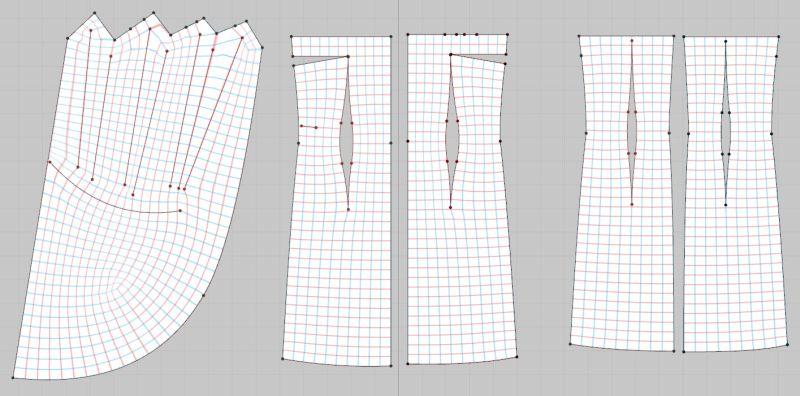 Example quad mesh output coming to Marvelous Designer soon Import into Zbrush 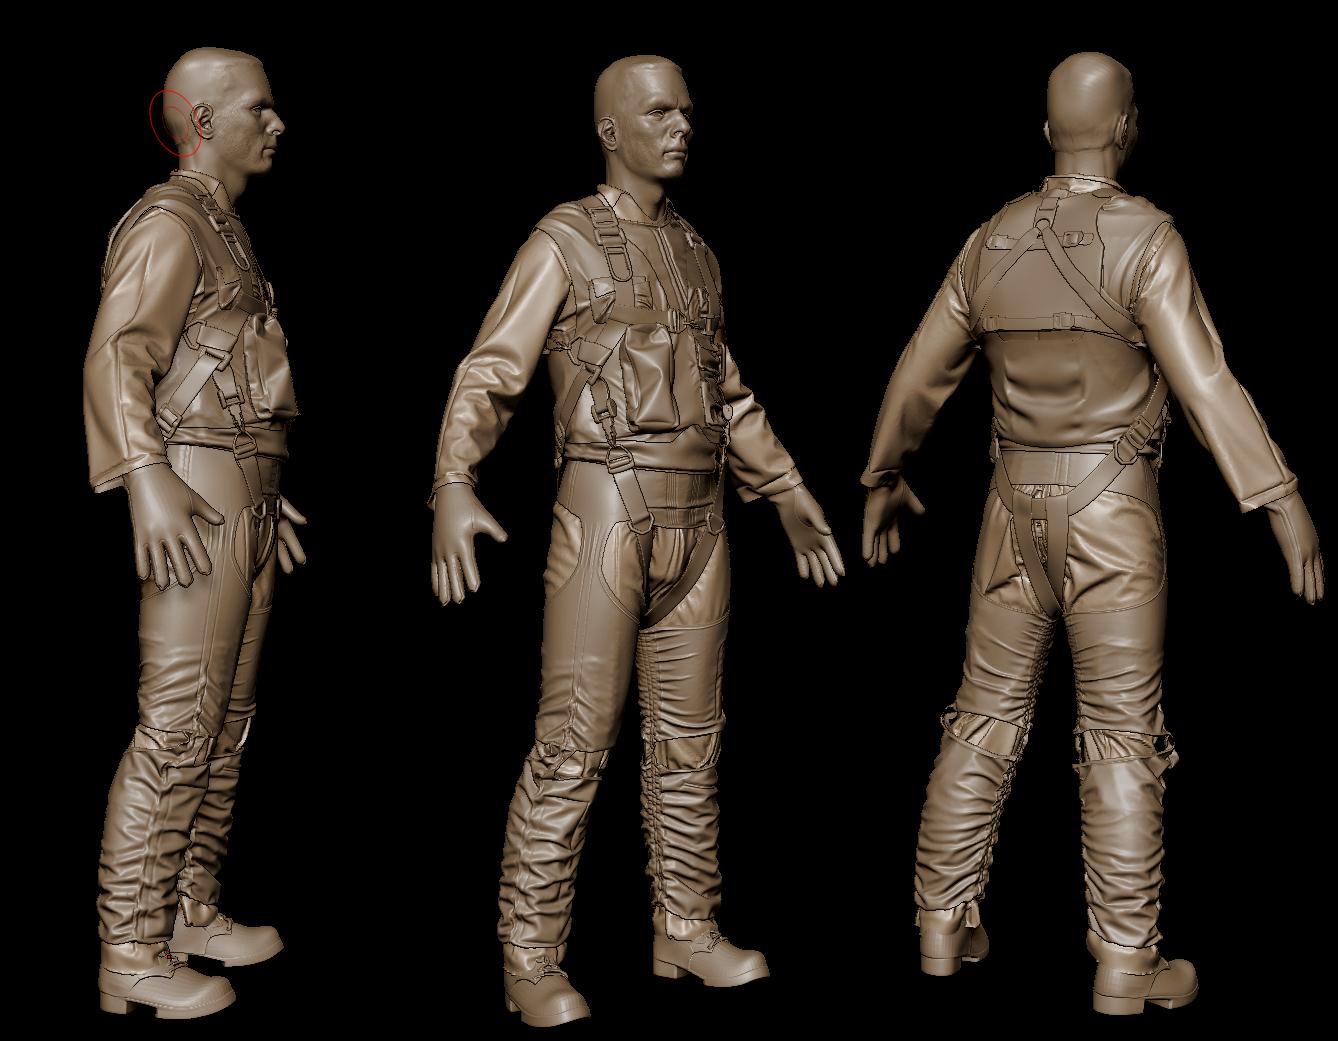 Retopologized model with projections from Marvelous Designer mesh Once I had retoplogized the 3D clothing in 3DS Max I brought the original Marvelous Designer mesh and the new quad mesh into Zbrush. This is done so that I could project the finer details from the Marvelous Designer mesh onto the new mesh and add more details such as stitching. In my tests, I found a denser retopologized mesh from 3DS Max was much better than a low polygonal mesh with regards to accurately projecting details in Zbrush. Detailing 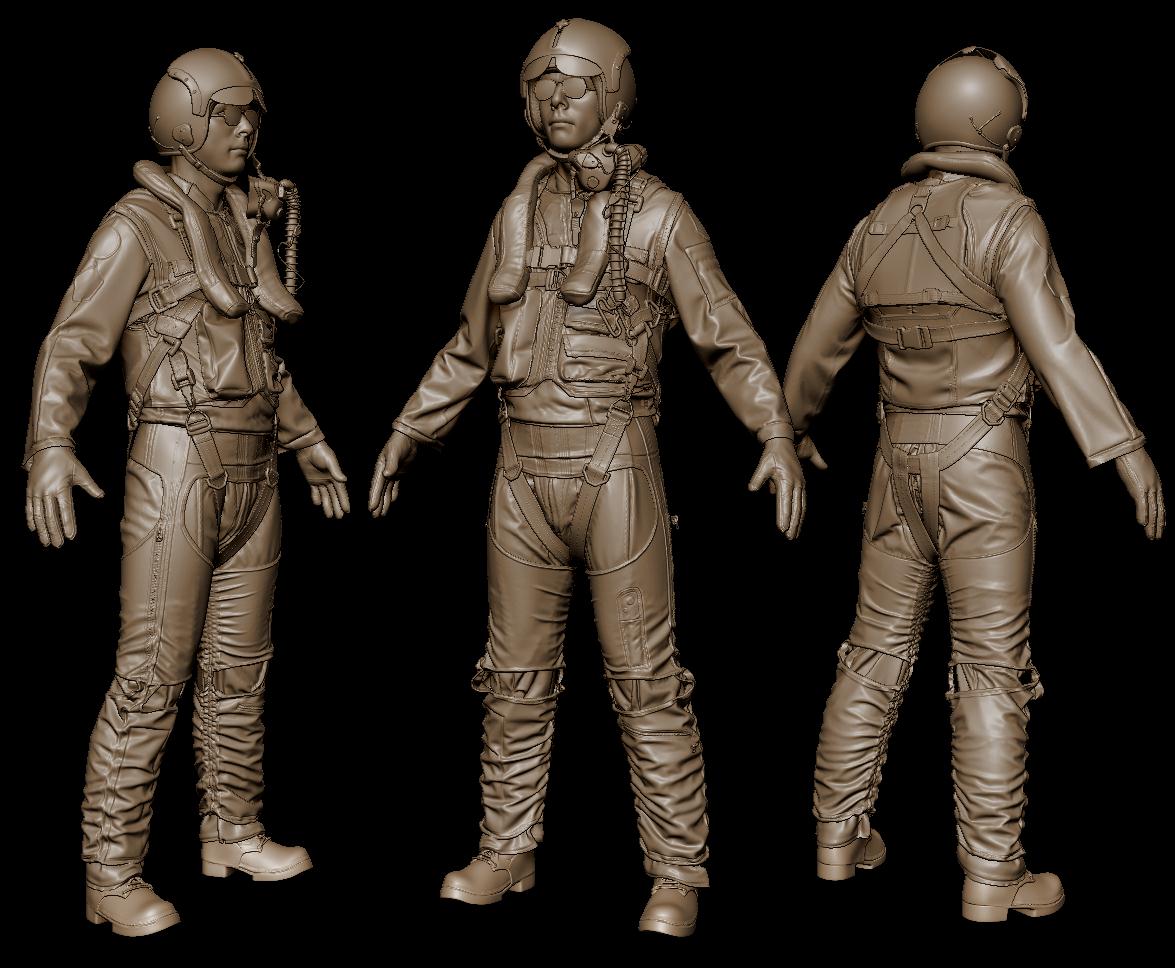 Final Zbrush sculpt At this point, I took my straps layer and brought it into modo so that I could model all of the buckles, snaps and other hard surface pieces that would be needed for the final costume. I also modeled the helmet, boots and glasses at this point. Back in Zbrush with all of the projections done and my final hard surface models attached as a new subtool, I was now able to detail out the fabric. Using mostly custom stitch brushes I was able to quickly add seams all over the model based off of the internal lines I originally created in Marvelous Designer. Final Render 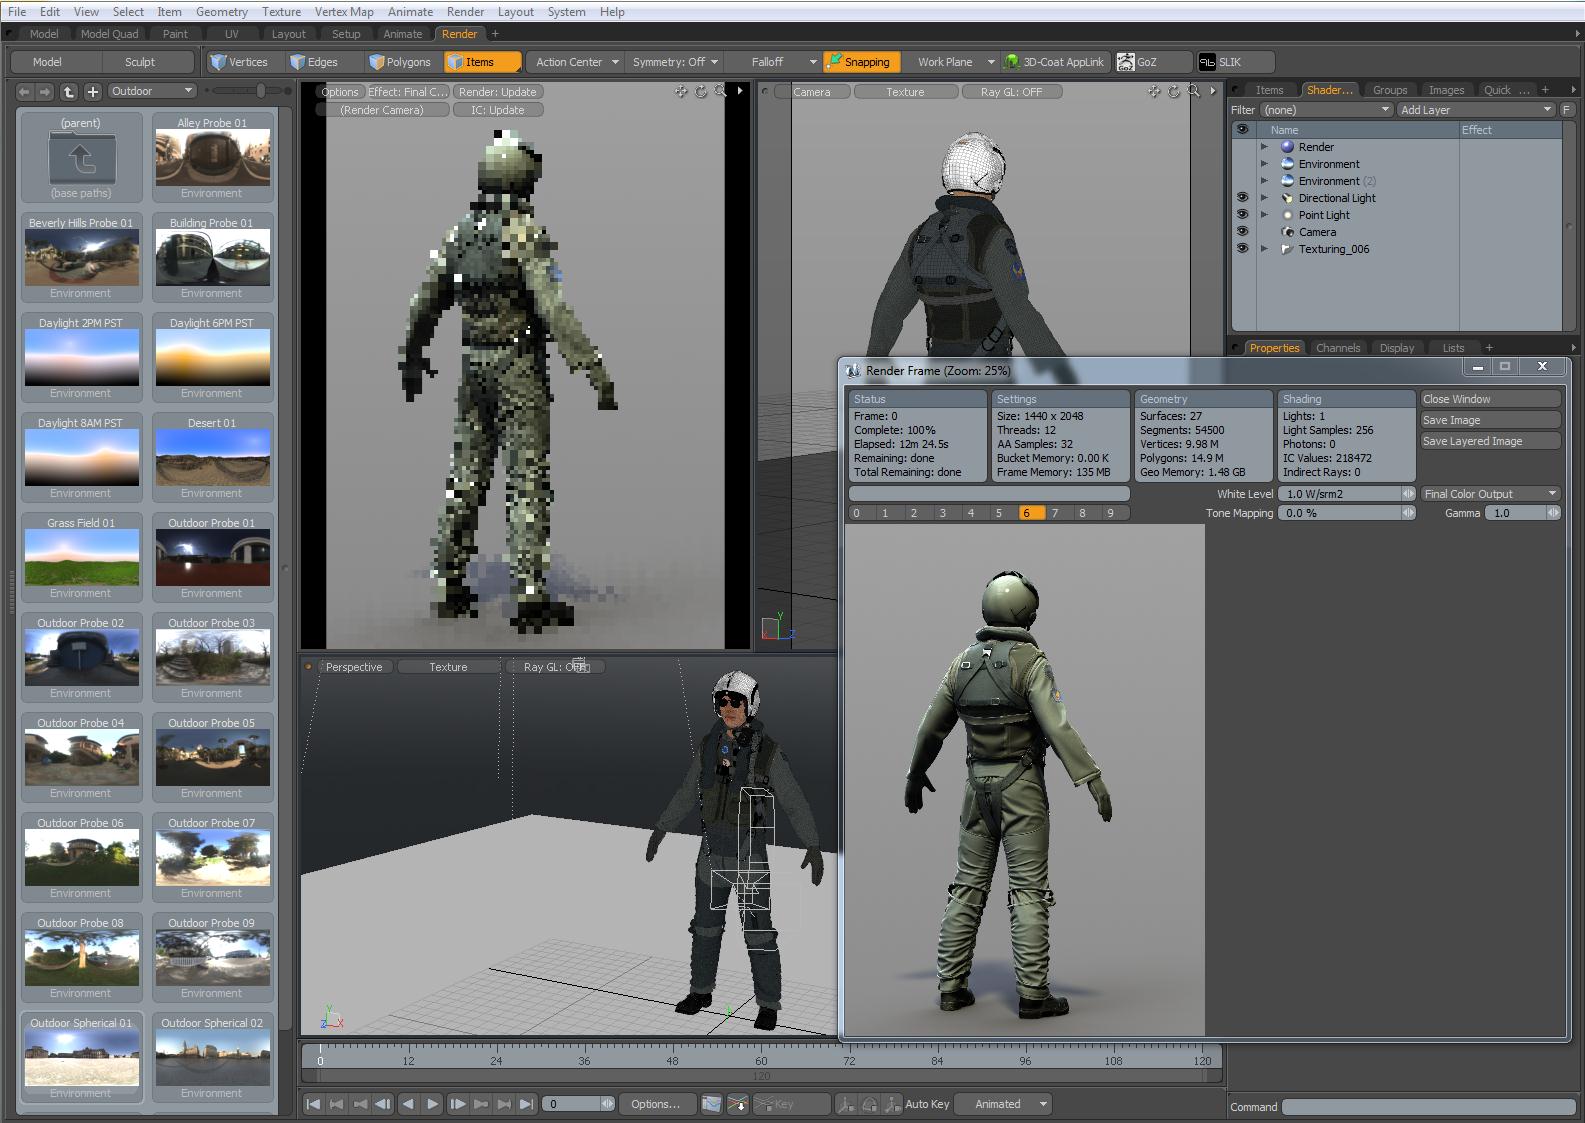 Modo viewport and final render As a final stage of this project I decided to render out the high resolution model inside of Luxology's modo. If I were to further develop this character into a game ready asset I would retopologize and bake my texture maps from this final high resolution model. However the purpose of this paper was to illustrate how Marvelous Designer could produce exceptionally high quality clothes with minimal effort on the artist's behalf. A very good Zbrush artist can achieve something similar to this model in about the same amount of time it took to create in Marvelous Designer. However if the costume needed to change or layers be removed it would take the Zbrush artist the same amount of time to resculpt the high resolution model. Other Cool Uses Drapery that can then be decimated 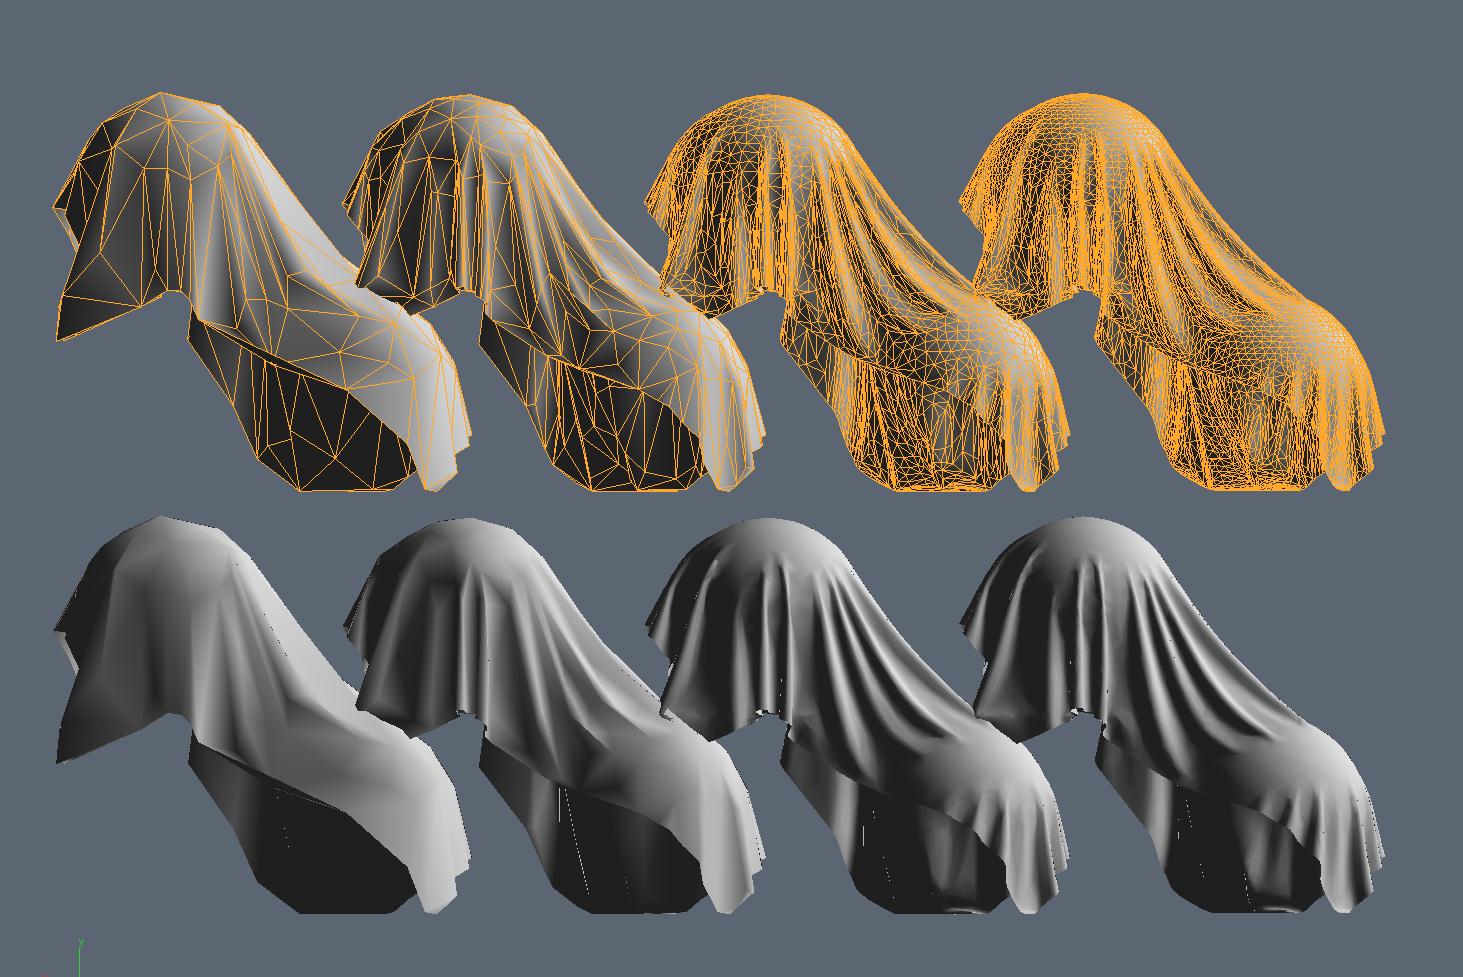 Multiple Resolutions of Decimation from Zbrush High resolution cloth looks nice but is not very practical for in-game objects. I have had very good success with using Zbrush's "Decimation Master" to create a low resolution game-ready mesh. I then use the original high resolution to bake maps such as Normal and Ambient Occlusion. Creating alpha stamps 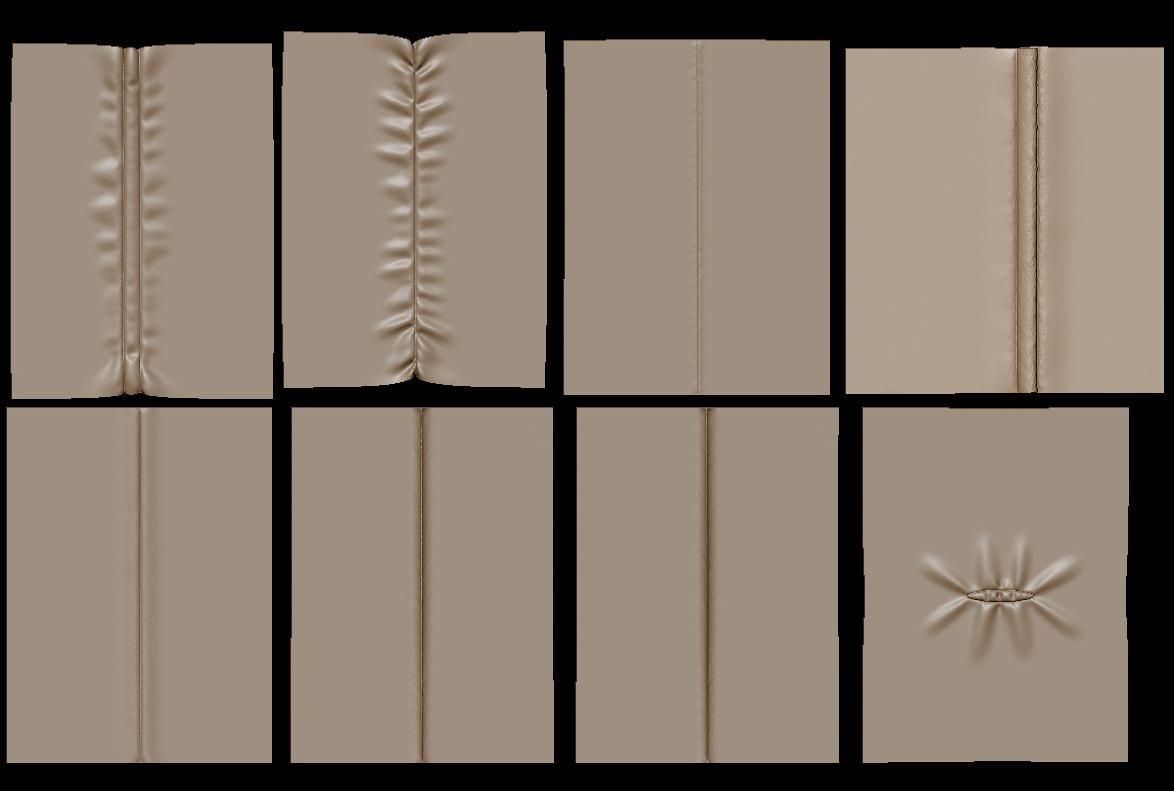 Marvelous Designer patterns exported to Zbrush You can use a flat mesh with internal lines to create interesting stitches and wrinkle patterns for use as an alpha in Zbrush or Mudbox. Animation and morphs 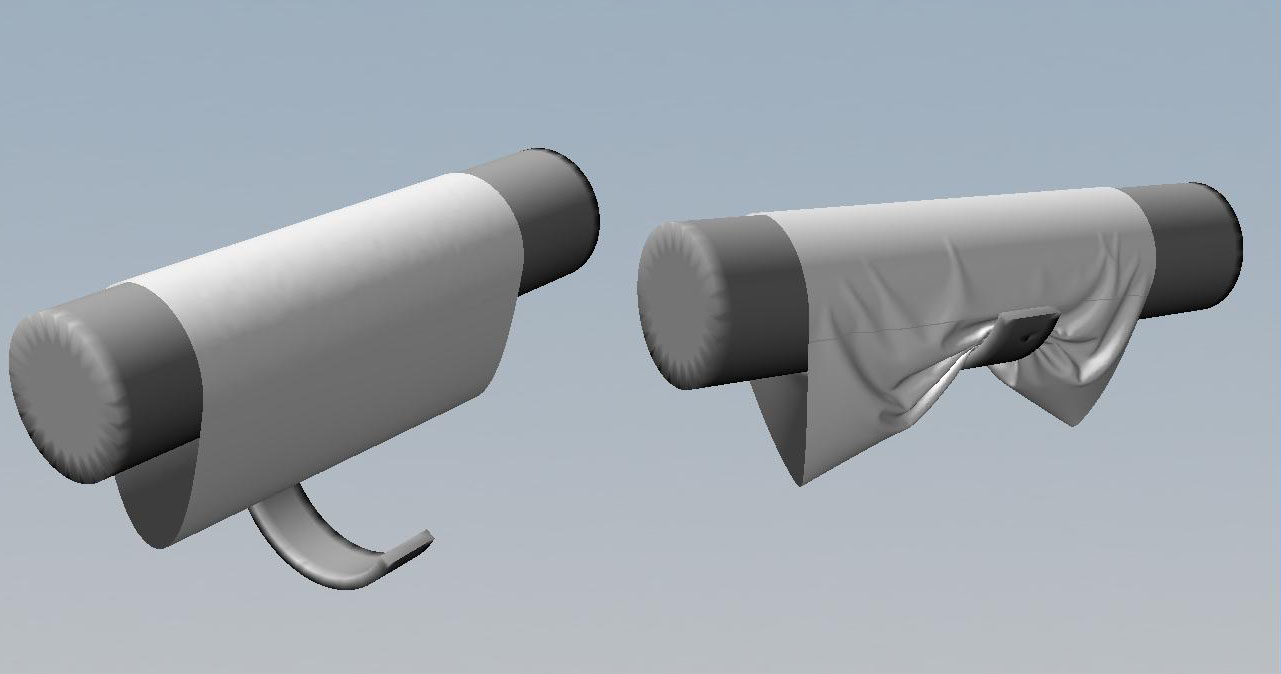 Example of using a morph target to affect complex drapery Additionally you can import several versions of your avatar as morph targets to interact with the cloth simulation. This would be particularly well suited for cloth underneath rigid armor. This example shows various corpses derived from the same base model and garment. Draping flowing garments 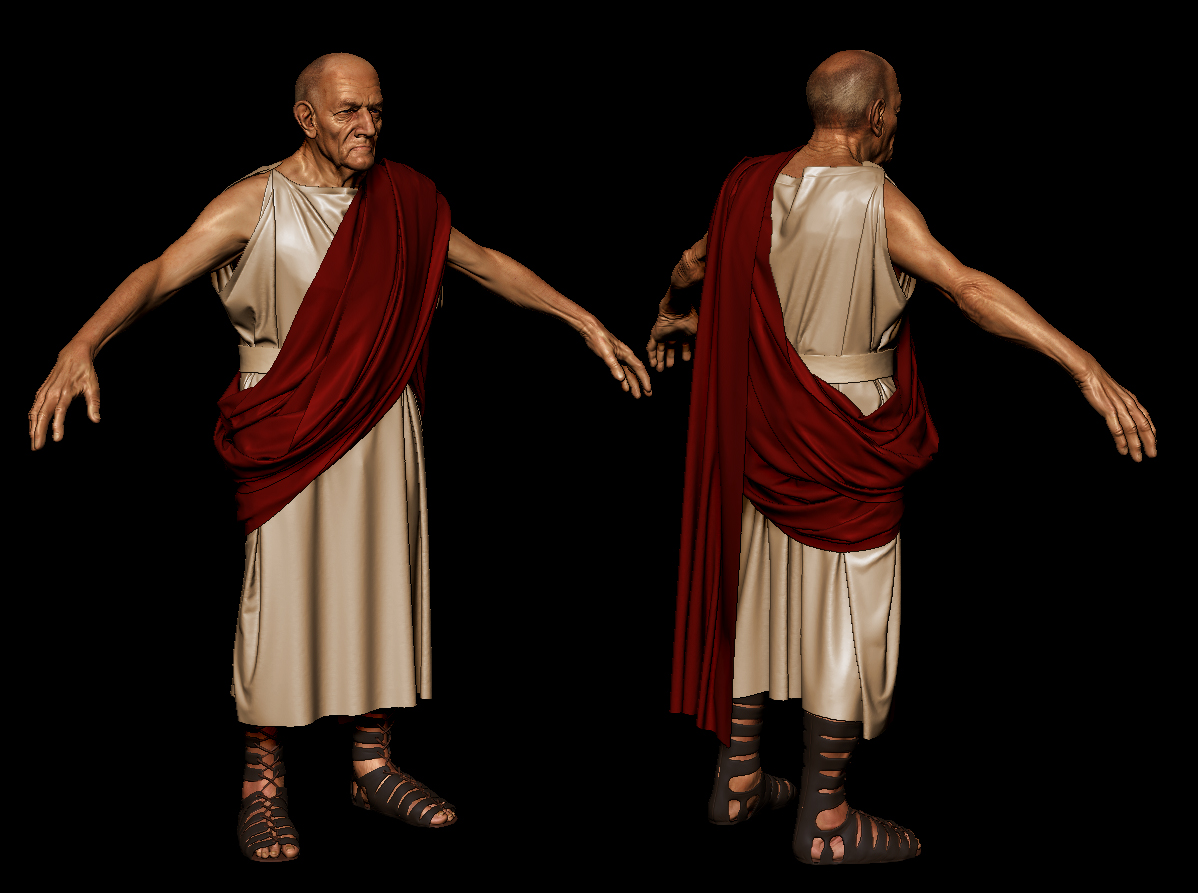 Complex draped model using pins It is also possible to create long flowing garments and overlapping shapes. By using pins during simulation you can slowly wrap fabric over itself to create complex shapes such as a toga on a model. Production Example 
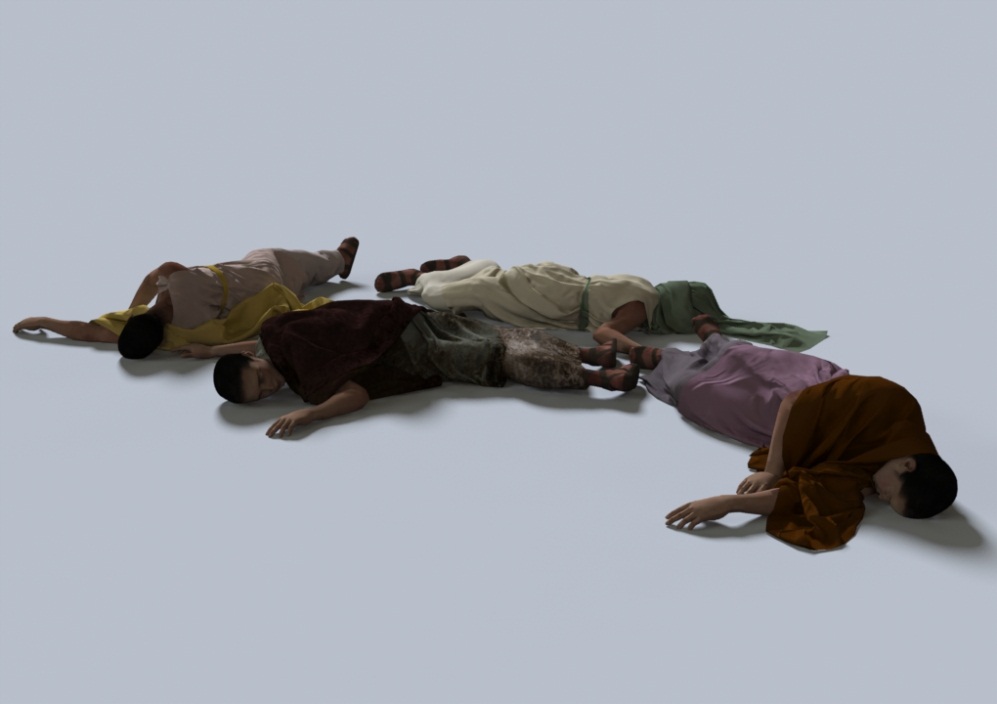 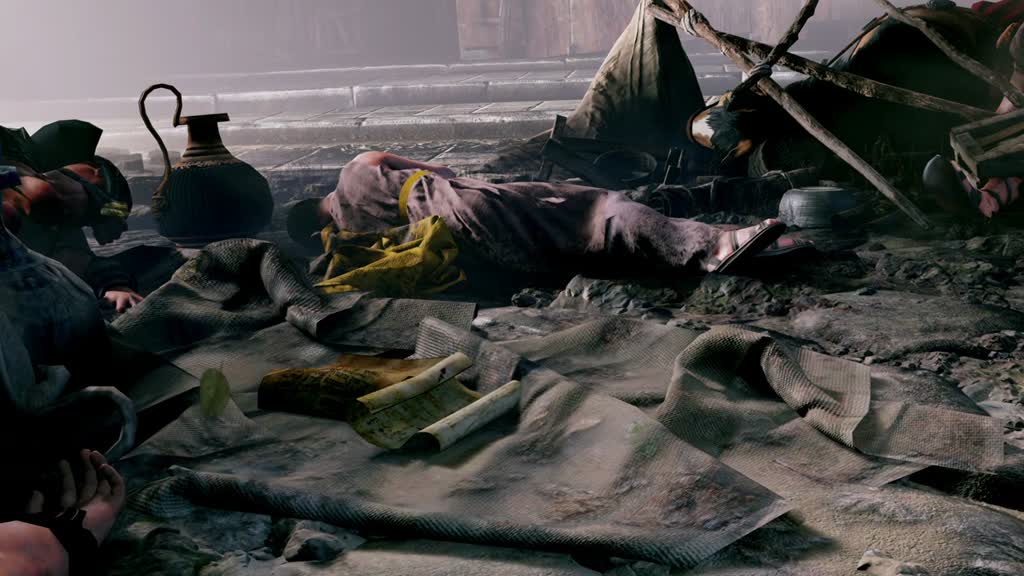 Corpse created using imported point cache files With Marvelous Designer, patterns can even be repurposed across a cast of characters. Variation in the fold patterns can be easily achieved by simply tugging at the simulating costume for different draping. The above examples show how I used Marvelous Designer to create extra corpses for the Crytek E3 Ryse video. Without Marvelous Designer, these results would have been impossible to achieve in the time alotted. |
||
|
This whitepaper is (c) of Microsoft Studios Created for: Contact: joel@joelmongeon.com All artwork is (c) the artist unless otherwise stated. |
||
